
Guess what I finished yesterday?
MY CURTAINS!
Oh man, was I excited to have this project finished. It took me a little longer than I thought, between the measuring, kids, husband, the curtains sucking up the paint like crazy, repeat trips to Lowe's for more paint, and the amount of stripes there were, BUT I am happy to report that I could not be more pleased with the end result!
Wanna see?!

Kitchen Curtains

Counter and Window View

Living Room

Window and Couch View

From the Hallway
I haven't done very many DIY projects for my home, but this gave me the itch. We are the most settled I've felt in years, so this was such an enjoyable experience. You know what I love about DIY projects? You can do it exactly how you want. Duh, right? But, seriously, if you can't find something that you want, and feel like there is some inspiration and creativity in you, go for it! You'll feel so proud of your accomplishment at the the end.
I got this idea from another blogger, via Pinterest, and she showed how she did the curtains, so I thought I would show you how I did them. It was super easy.
Step 1: Iron Your Curtains
I found them easier to measure that way.

Step 2: Measure your curtains
I did mine with 4 inch stripes.
The length of curtains depends on how thick your stripes will be.
Do whatever looks best to you.
The ironing board was the perfect place to do the measuring.
Start from the top, and mark your measurements.
Do that all the way across.
Use a yard stick, or level, to draw a straight line, connecting all of the marks.
Continue making marks, and lines until you reach the bottom of the curtain, measuring 4 inches- or whatever you chose- all the way.


Step 3: Tape The Lines
The hard part is over. Tape on the lines to create division for the color.
Green Frog Tape, is hands down, the best out that. I would use that for the taping.
It looks like some stripes are smaller than others, but I promise it will turn out. You have to alternate between the tape being above the line and below the line, to make the stripes even. Does that make sense? I hope so! Email me at jmcadriel@gmail.com if you have any questions about the taping.
It should look something like the picture below, after you're done.

Step 4: Start Rolling That Paint!
This is where it got fun for me. Seeing it start to come together was worth all that measuring.
I used a thinner 4'' roller, because the paint would have been too gloppy with a regular sized hand roller, and would have been wider than the width of the lines.
Unless your stripes are a lot thicker, I would highly recommend that smaller roller. I went through two sponges. Total it cost me $7.00... Not too shabby.
Once you've got everything ready, and set up. Start rolling that paint!
My particular curtains sucked in a lot of paint, so I used more than I anticipated. I should have gotten a gallon of paint. I got one quart at first, then went back for another quart.
I had 6 valances all together, with 4 gray stripes each. I was able to cover 3 curtains, 12 stripes, with a quart can. Just a reference.
Depends on your project.
HERE is a link to the color I use. "Cathedral Stone," by Valspar. LOVE this color!

I painted on an old mattress we're dying to get rid of. Classy, huh?


Step 5: Hang Them To Dry

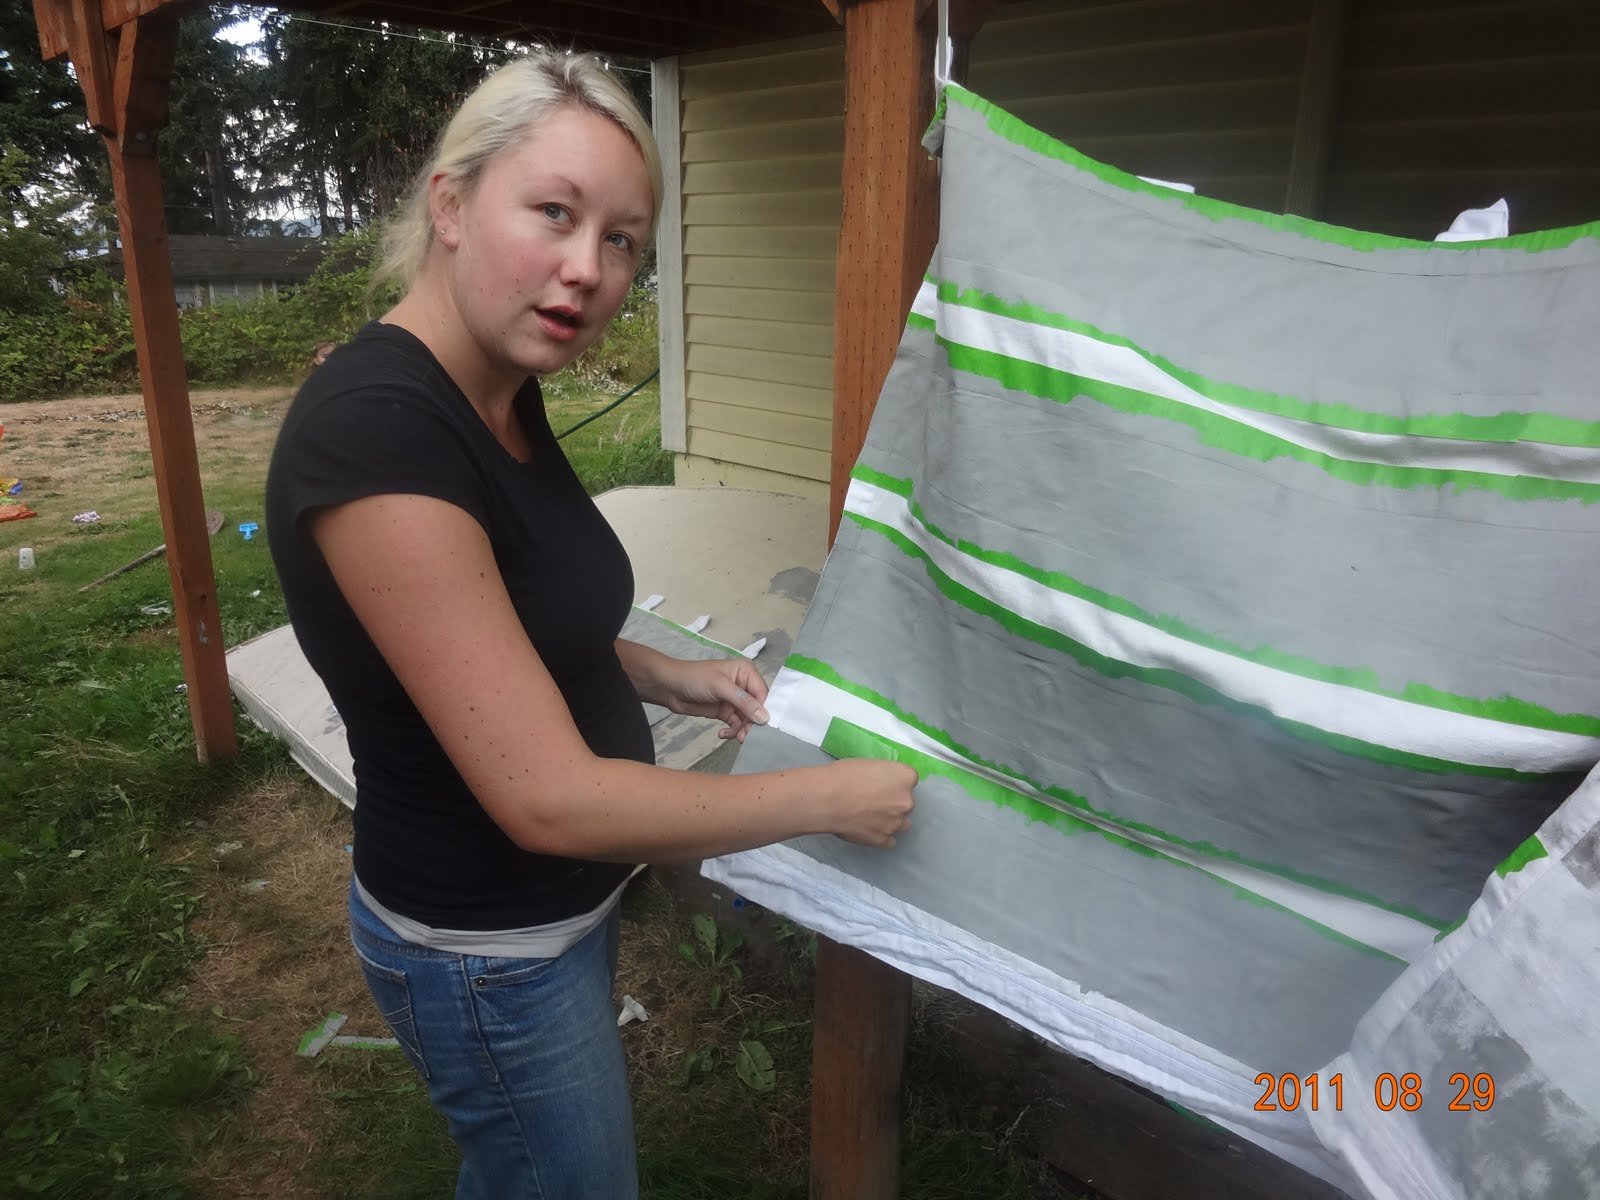
Step 6: Pull Off The Tape
Give your husband a silly, "Excuse Me?" face, when he makes fun of you for wanting him to take pictures of the process.
Thanks babe! I love you!

After I took off the tape I let it hang dry for a little bit longer.
I was SO excited when I saw what it looked like!

Just so you know, they didn't turn out absolutely flawlessly. I got over excited while rolling, and some gray got into the white, and there was very minimal bleeding. But, because curtains bend and fold when they're hung, you'll hardly be able to tell. All of that to say, don't beat yourself up if you don't get it perfectly. I promise they will still look good.
Step 7: Hang Your Curtains and Enjoy!
Once again, here are a few pictures of the final product. I'm super duper pleased!
What do you think?
Hooray for privacy again!
If you do something like this, I'd love to hear how it goes, and see your pictures!
I hope this "tutorial" helped. Don't hesitate to email me if you have any questions.
jmcadriel@gmail.com
Have a great day!
Cute! You're fabulous. Now...are they washable?
ReplyDeleteThanks, Jaime! I believe they are washable. There is some sort of chemical that you can put on them so when you wash them, they don't get ruined. I didn't do it yet, but when they need to be washed, I'm going to try that. I'll let you know how it goes ;).
ReplyDelete